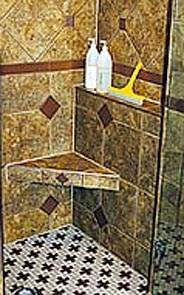
Having a seat in the corner of your shower can be a lifesaving feature
To some, a corner shower seat is simply an attractive add-on, but for others it can be a life-saving safety feature. A necessity. My own sister is a good example of that. As a severe epileptic, not having a seat in her shower could pose a real danger.
There are many other people in similar shoes, and not just epileptics. People who have suffered injuries or are too ill to be able to stand long enough to take a full shower. Some are just getting older and no longer have the strength.
Whatever the reason there are many, many people out there who need this feature, not simply as a convenience, but for their own safety.
What To Know
There are different kinds of corner shower seats out there, but we’ve intentionally chosen to talk about a style here that’s relatively easy and quick to install, and not prohibitively expensive.
Some of these seats will require that you completely replace the entire shower and choose from a limited number of styles. This is not only a very expensive option, but also a slow one. It takes time to have something like this installed.
The type we’ll talk about can be installed with a new shower or simply added onto an existing one. The one limitation is that it’s designed to be used in tile showers, rather than the plastic or fiberglass versions common in many private restrooms today. This means it requires a 90 degree hard edged corner to fit into.
~
Installing
When installing this type of corner seat, it’s probably easiest to install it in a new shower while in the process, but it can be added on later. Be sure to look for benches that can support your weight. The example we chose for the photo needs no special support underneath, yet can support up to 400 pounds.
Once you’ve measured and chosen the exact spot to place your seat, you’ll need to drill the pilot holes for the fasteners. A hammer drill with a masonry bit will go through cement board substrate like butter, but even if you don’t have access to a hammer drill, be sure to use a masonry bit. Insert the fastener sleeve into the hole and then use a hand screwdriver to install the screws.
Once that’s done, fill the entire unit with mortar, starting at the back and moving forward. This allows any liquid buildup to escape from the front rather than getting trapped inside the unit. Fill and smooth the front as well as the top. The bottom is too low to be seen and does not need to be finished.
Once the mortaring is complete, tile and grout as desired to match your shower. The people you purchase the corner shower seat from will have more complete instructions for you that should be followed for the long life of the product and personal safety.