Fold your own envelopes for a unique invitation
When you’re choosing invitations for a wedding, a party or any kind of special event, “special” is the key word here. For a really unique and memorable invitation, consider making your own envelopes rather than using pre-packaged sets that anyone might have.
Below are instructions on how to fold envelopes from normal sized 8.5 x 11 inch paper. The method below will make the right size envelope for a 5 x 7 invitation.
In addition to the paper itself, you’ll also need a glue stick.
Choosing the paper
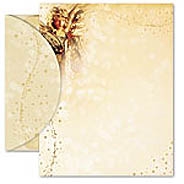
Start off by choosing the right kind of paper to make the envelopes. Plain white paper would defeat the purpose.
You can use the exact same paper that you’re using for the invitations themselves, or you could choose a different paper that complements the invitation paper.
Craft stores are a good place to find a variety of papers, or you could use an online craft paper store, for a great selection. Scrapbook paper is a great choice, since in comes in so many colors and patterns. You could even cut wrapping paper into the correct size.
Folding the paper
Once you’ve selected the perfect paper, start off by holding the paper so the right and left sides are the longer sides (eleven inches) and the top and bottom are the shorter sides (eight and a half inches). If the paper is plain white on one side, have the white side facing up and the printed side facing down.
- Make a half-inch fold along the left and right sides of the paper from top to bottom.
- Measure 4 inches from the bottom and fold a straight line across that point, lifting the bottom fold up.
- Use the glue stick to glue the edges of the bottom fold to the half-inch folds on the sides. You’ll now have the main body of the envelope complete.
- Fold a two-inch seam into the top of the envelope. This will make the flap to close the envelope.
- Once you’ve inserted the invitation, you can fold over the top and seal it with a thin stripe from the glue stick.
Just a bit fancier
Alternately, if you want the envelopes to be just a bit fancier and they’re not being mailed, once you have glued the body of the envelope together, you can cut the remaining part which will become the top flap into a triangle shape and make a simple cut into the body so you can tuck the flap into the cut to keep the envelope closed.
This is a bit more difficult and of course requires cutting, so this step can be let out and you’ll still have your own custom envelopes.
When is comes to how to fold envelopes, as well as making your own invitations, the key is choosing the right papers that complement the event you’re holding, both for the envelopes and for the invitations themselves. This will create a very unique effect that you will never have to worry about anyone else also having for their own event.