Gather the kids and try out these recipes for making clay
So, you want to take a stab at making your own clay, eh? Got the urge to re-enact that famous pottery-wheel scene from the movie “Ghost”? Or maybe you’re tired of the kids making mud pies and tracking dirt into the house. Either way, making homemade clay is a piece of cake. Even the kids can do it.
Keep reading to learn just how to make a simple clay from everyday food products. You probably already have most of this stocked in the kitchen.
Ingredients
3 1/2 cups of all-purpose flour
1/2 cup salt
1 Tbsp. cream of tartar
2 1/2 Tbsp. oil
2 cups water
Directions
Bring the water to a boil. While you’re waiting for the water to heat up, stir together all the dry ingredients in a large bowl. Once the water begins to boil, add the oil followed by the mixture of dry ingredients.
Once the concoction is completely mixed, set it aside to cool. Once cool enough to touch, place the lump on a cookie sheet and begin kneading it until it starts to feel like store-bought clay. Note: When finished, store in an airtight container so the moisture doesn’t evaporate, leaving only a hard, massive clump of dry clay.
Also, if you want to make colored clay, simply add some food coloring to the water while it’s boiling.
~
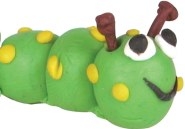
OK, so that type of clay might keep the kids busy for a day, but what about a more permanent type of clay? Clay you can use to make jewelry or small ornaments is called bread clay.
And you can make it from the comfort of your own kitchen as well.
Ingredients
Three slices of white bread
White glue, preferably the non-toxic variety
Food coloring or tempera paints (to add, yes, color!)
Directions
The kids will love this: The first step is to tear the crust off the bread and then break the bread into small pieces in a bowl.
It only gets better (and messier). Next, pour the glue into the bowl; at the same time mixing the bread and glue with your hand. Pour the glue gradually until it (eventually) feels smooth and pliable to the touch.
Roll out the clay and let the kids’ imaginations go nuts — cut out shapes, decorate the clay, make ornaments out of it for jewelry.
Finally, let the masterpieces dry (this can take up to a few days, depending on the size of the object). If you want to get truly authentic, once the clay pieces dry spray them with an acrylic sealer to give them some shine.
OK, so maybe you didn’t get to re-enact that wheel scene from “Ghost,” but you did learn how to make clay. For more advanced clay options you may have to hit up the art store.