Celebrate wearing fun New Year’s hats that are homemade
New Year’s Eve is a great time for a party. You can celebrate the passing of the old year, and ring in the new. Celebrating the beginning of a new year is a sign of optimism and hope, and can be a great way to mark the passing of time with your friends and family. It doesn’t have to be expensive, either.
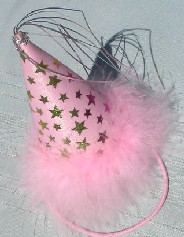
Using paper crafts, craft foam, and other easy-to-find supplies, you can make some homemade New Year’s hats for your party. Get your kids in on the fun, and they’ll have the joy of dressing up for the festivities in some of their own creations.
Basic cone hat
Supplies:
12×18 inch paper in solid colors (or a similar size, look for scrapbooking paper)
Glue
Scissors
Stickers
Sequins
Markers
Glitter glue
Yarn (optional)
Directions:
Turn the paper sideways so that you have a diamond shape, and draw a large triangle in light pencil, using the shorter side as the hat’s height. Change the bottom of the triangle from a straight line to a wide curve, and cut out your hat. Erase any visible pencil marks.
Lay your hat flat on the table, and then decorate it using the stickers, sequins, markers, and glitter glue. After the hat has dried, apply a thin line of glue along one side of the hat, and then roll into a cone shape, with the base large enough to fit around someone’s head. Press the glue firmly and allow it to dry.
You can dress your New Year’s hats up even more with pom-poms or tassels made out of yarn.
~
Paper sombrero
Supplies:
Newspapers ? 2 bi-fold pages for each hat
Masking tape
Spray paint
Wide ribbon
Glue
Stickers, sequins, and glitter glue for decorations
Directions:
Take two large, bi-fold pages out of the newspaper, and lay one on top of the other at a 45-degree angle, so that it looks like a star with eight points.
Place the center of the over-lapping papers over someone’s head, and push the sides down to form a head-shaped dome. Wrap masking tape around the hat, at about ear level.
Scrunch the sides together and roll them to form a brim in a sombrero shape. Spray paint the entire hat and wait for it to dry.
Wrap the ribbon over the crown of the hat to cover the masking tape and secure with some glue.
Decorate your hat using stickers, sequins, and glitter glue.
This hat can easily be modified to make a top hat shape. When forming the dome of the hat, leave more paper and shape into a round stovepipe shape. Scrunch the brim and cut in a perfectly round shape. Spray-paint the hat black, and cover the tape with a red ribbon.
Buggy antennas
Supplies:
Plastic headband
Long pipe cleaners
Large pom-poms
Pencil
Low-temperature glue gun
Directions:
Wrap the pipe cleaners around the pencil to form curly springs. Wrap one end of each pipe cleaner around the headband in the right location for them to stick up like bug antennas. Secure the pipe cleaners to the headband with glue. Glue a pom-pom to the top of each pipe cleaner, and there you have your antennas.
Medieval jester hat
Supplies:
Craft foam in bright primary colors: red, green, blue, yellow
Scissors
Low-temp glue gun
Jingle bells
Directions:
Cut a wide strip of craft foam in your main color that will go all the way around someone’s head. The strip should be about five inches high.
Using a pencil, draw large pennant shapes. You will need six: two in your main color and two of each in contrasting colors.
Use the hot glue gun to draw a thin line of glue on one narrow end of the band shape. Curve the band around, and press the other end into the glue, holding while it dries.
Glue the pennant shapes point size up around the band, with matching colors opposite each other. The pennants will flop down, just like a jester’s hat. Glue jingle bells to the tip of each pennant.