If you follow a few steps, even beginners can paint wood furniture like a pro
Imagine having the furniture and cabinets you always wanted. The color is perfect. The finish is just what you wanted. From trim to hardware, each piece is exactly right.
Now imagine that you can have all of this at a cost that will not break the bank. Is it possible?
If you master the simple art of staining and painting wood furniture, you can enjoy the furniture you want, at a cost even the most frugal homeowner will appreciate. The steps are simple. And with a little practice and a few basic supplies, you can learn the art of painting wood furniture like a pro.
Deciding what to paint
Beautiful painted furniture can start two ways. You can buy unfinished furniture or you can reclaim existing pieces and give them a new life. The process for prepping the pieces depends on which option you select.
Starting with unfinished furniture
Buying quality ready-to-finish furniture or cabinets is the easiest way to get the stained or painted furniture look you want.
In the past, unpainted furniture was limited to a few pieces. If you wanted anything beyond a simple chest of drawers or a rocker, you were out of luck. To make matters worse, the craftsmanship was often less than ideal.
Thank goodness those days are in the past. Today’s unfinished furniture includes beautifully crafted items for every room in your home, from beds to kitchen cabinets. The exact steps for painting wood furniture will vary depending upon the finish – shabby chic, for example – you select, but there are a few basic steps everyone should take.
- Remove all hardware such as knobs, hinges, etc.
- Sand the entire piece lightly with fine grain sandpaper. This is important even if the furniture feels smooth, as it preps the surface for paint.
- Wipe down the surface with a tack cloth to remove the sanding dust and other surface dust.
- Prepare your workspace. Make sure you have all needed brushes, drop cloths, brush cleaner, rags, and of course, your paint, before you start. Having to run out to the store in the middle of a project is never a good idea.
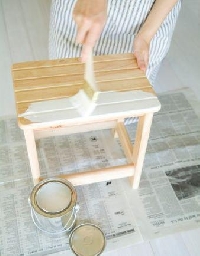
- Apply thin, even coats of paint. Allow the paint to dry completely between coats to avoid “orange peel” textures, runs and drips.
- After the piece is completely dry, it’s a good idea to seal it. You can select a gloss or flat urethane, a traditional shellac, or a hand-rubbed wax seal to protect your paint and give your furniture a professional, finished look.
~
Painting wood furniture with a history
Painting wood furniture that already has a finish is an inexpensive way to give a new look to older pieces. Choosing a single color or a harmonious group of colors is an easy way to bring together unmatched furniture in a room, and give your decor a whole new style.
- Remove all hardware such as knobs, hinges, etc.
- Use a medium to coarse grain sandpaper to remove at least the surface layer of the old color. If you want a more polished end result, consider stripping the piece with a paste stripper. These thick strippers stick to vertical surface and do an excellent job on carved details.
- Wipe down the surface with a dilute TSP (Trisodium Phosphate) solution to remove any grease, stripper residue or dirt. Allow the wood to dry completely before proceeding.
- Seal any stains or discolored spots with a quality oil primer or opaque shellac.
- If you did not strip the item, make sure your new paint is compatible with the old. In general, oil is a better choice for furniture, especially bookshelves, tables and dressers where latex might create a tacky surface even after it dries.
- Continue with the remaining steps in the unfinished furniture section above. (Number 4-6)
Painting wood furniture is a wonderful way to add a personal touch to every room in your home. With a few simple tools, your favorite paint colors and some patience, you can create the perfect furnishings for your home sweet home.