Tiling a backsplash: an easy do-it-yourself project to transform any kitchen
If you are considering whether to update your kitchen with a tile backsplash, you should know that that adding a backsplash is one of the easiest do-it-yourself home improvement projects. A tile backsplash can truly transform the style and sophistication of a kitchen.
In addition to adding style, backsplashes protect kitchen walls. Tile is an ideal option near the stove, sink or counter areas where water, grease and food splatters are most common. Tile can be easily cleaned with a wet sponge, or even disinfectant. Ultimately, adding a tile backsplash can make for a more sanitary kitchen, where cleanup chores are a breeze.
The possibilities are endless when it comes to selecting materials for kitchen backsplashes. A very stylish, economical, and certainly the easiest do-it-yourself backsplash material is tile – either ceramic, porcelain or glass. Other popular backsplash materials include metal, granite or marble.
To update your kitchen with a tile backsplash, it?s best to begin with some preliminary research. Visit tile stores, or search online tile specialists for patterns, colors and textures of tile that appeal to you. Browse the kitchen or home improvement sections of local book stores or libraries for books with photographs and examples of backsplashes. Thumb through home and d?cor themed magazines, and mark the photos that reflect the kitchen or backsplash style you are aspiring to create.
Once you have researched and familiarized yourself with the standard designs and techniques for tiling, its okay to begin thinking ?out of the box? and allow yourself a bit of creative license to update your kitchen with a tile backsplash.
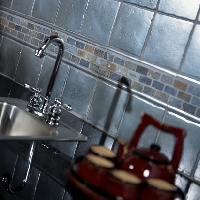
For example, think about combining or collaging different styles and sizes of tile. Or, try using just a few elaborate, high-end tiles as accents or borders. Small, metallic mosaic tiles have been a particularly popular backsplash item for contemporary kitchens. Under cabinet lighting can really set of the shine and sparkle of metallic tiles, lending some ?bling? to otherwise ordinary kitchens. Other more uncommon and innovative varieties of tiles include; natural stone tile, vinyl tile, or even pebbles shaped into tiles.
After selecting tiles, plan the layout and design of your backsplash by measuring wall space and drawing your tile scheme. Some tiles may require cutting, with a wet saw, to fit against corners, edges, and around power outlets. Be sure to shut off electrical power to all outlets within your kitchen backsplash area at the main circuit box of your home.
~
The first step of installing a modern tile backsplash is skimming a thin layer of thin set mortar onto the area of the wall you plan to tile. Thin set mortar, along with a thin set trowel, can be purchased at any hardware or home improvement store. Carefully read the directions on the bag of thin set mortar, as you will need to mix certain measured quantities with particular amounts of water.
Tiles should be applied to the wall while the thin set mortar is still wet. Smaller tiles may be applied directly into the thin set. Larger tiles may require a thin coat of thin set mortar on the back of the tile in order to ensure an equal and level bond to the thin set bed on the wall. Applying a thin coat of thin set to the back of larger tiles will also help you to avoid any air bubbles that can lead to cracks, or inconsistencies in your backsplash.
A tile backsplash should be installed on the first day, allowed to dry for 10-12 hours, and then grouted on the second day. Prior to grouting your backsplash, clean the tiles and joints with a damp sponge or rag to remove dirt or any exposed clumps or streaks of dried thin set mortar. Ideally, the backsplash joints (along the walls, counter base or cabinets) should be grouted with a mildew resistant silicone caulk.
Grout can be purchased in a variety of colors to match or compliment tile. Typically, grout is sold in bags as a dried powder that must be mixed with water. Once mixed, grout should have the consistency of cake batter.
Using a grouting float, scoop a glob of grout into your starting point on the tile backsplash. Use the grout float as you would use a squeegee to squeeze the grout into all the tile joints. Grout only a small area of the backsplash at a time, until you acquire a level of comfort with the process. Grout should be allowed to set for approximately fifteen minutes. Then, use a damp sponge to clean the grout off the tile surfaces. Take care not to dig the grout out from the tile joints.
Once your tile backsplash is completed, allow twenty four hours for the grout to set. Then, clean the dust and grout haze from your backsplash using a solution of 1 cup of white vinegar per one gallon of water. A large soft sponge or rag is the best item to use for cleaning your backsplash.
Making the decision to update your kitchen with a tile backsplash, and selecting the tiles to suit your particular taste may be the hardest part of the whole process. Ultimately, installing a tile backsplash is a simple do-it-yourself project that can be accomplished in the span of a few short days.
References:
This Old House: how to install a tile backsplash
Home Depot: How to tile a kitchen backsplash